


Table of Contents
What Is Git and Why Should You Learn It?
In short, this is a version control system that monitors changes to files in your project. It makes it possible for developers to:
- Save versions of their code
- Collaborate without overwriting each other’s work
- Rollback to previous versions when something gets busted
If you ever worked on a Word document and saved such versions as “project_final_FINAL_2.docx,” you understand the issue this tool solves — organized version history.
So if you are starting from scratch in with this tool, you are at the right path to becoming a true professional developer.
Prerequisites: Tools You’ll Need
Before we jump into commands, let’s set up:
- Install VCS
- Download from https://git-scm.com/
- Use default settings during installation
- Text Editor (Optional)
- VS Code, Sublime Text, or any IDE
- VS Code, Sublime Text, or any IDE
- Terminal or Command Prompt
- macOS/Linux: Use Terminal
- Windows: Git Bash or PowerShell
Step 1: Configure it on Your System
First, identify yourself to the source control . For every change, your name and email are recorded.
git config –global user.name “Your Name”
git config –global user.email “you@example.com”
To verify:
git config –list
You’re now ready to start using the system.
Step 2: Create Your First Repository
Let’s simulate a project folder:
mkdir my-first-git-project
cd my-first-git-project
Now turn this folder into repository:
git init
You’ve just initialized an empty VCS repo!
Step 3: Create and Track Your File
Create a new file:
echo “Hello, World!” > hello.txt
Now check the status:
git status
You’ll see that version control system detects hello.txt as an untracked file. To start tracking:
git add hello.txt
Now the file is staged and ready to be committed.
Step 4: Make Your First Commit
Here comes the exciting part—your first commit!
git commit -m “My first commit!”
This message should be brief, describing the changes you’ve made. Well, that’s it. You now have an official snapshot of your work.
If you get this far, kudos! You have completed your version control system first commit tutorial.
Optional: See the Log of Your Commits
Want to check what you’ve done?
git log
This will show:
- Commit ID
- Author name/email
- Date/time
- Commit message
You’re officially learning version control system like a professional. From here, you move from zero to hero in version control.
1. What is a Repository?
A repository is simply a storage location for your project’s files and their entire change history. Think of it as a timeline that records every edit, addition, or deletion, allowing you to revisit any point in the project’s past.
2. What Does a Commit Mean?
A commit is like saving a checkpoint in your project. Instead of just pressing “Save” on a file, a commit captures the state of the project at a particular moment, along with a message that explains what was changed.
3. Why is Staging Important?
Staging acts as a preparation area. Before changes are permanently recorded, they can be added to the staging area for review. This makes it easy to organize work into logical groups of changes rather than saving everything at once.
4. What Are Remotes?
A remote is a version of your repository that lives online or on another server. By connecting your local project to a remote, you can share your work with others, collaborate in real time, and keep a backup of your code.
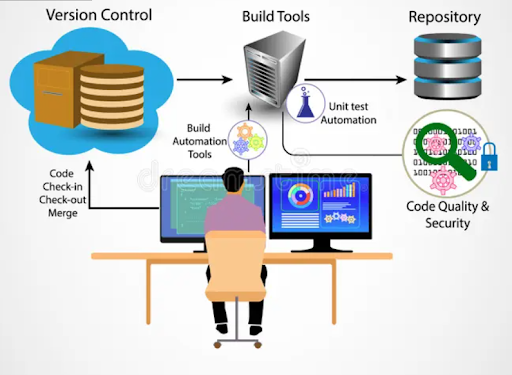
5. What is Version Control?
Version control is the broader concept behind repositories, commits, staging, and remotes. It ensures that developers can work safely, track progress, and maintain a complete history of their codebase.
Bonus: Connecting to GitHub (Optional)
If you want to save your repo online, or collaborate with others, you will push your code to code hosting platform.
- Open a free account
- Create a new repository (no README)
In the terminal:
version control system remote add origin https://github.com/yourusername/yourrepo.git
git branch -M main
git push -u origin main
Now your work on the local system is present on code hosting platform! You have just learnt using this tool with remote repository.
Quick Workflow Summary
This is an extremely beginner-friendly workflow in the version control system world:
# 1. See what’s changed
git status
# 2. Stage the file(s)
git add .
# 3. Save changes with a message
git commit -m “Describe your changes”
# 4. Push the code (if connected)
git push
Repeat this cycle as you build your project.
Bonus Tips for Beginners
- Commit often with meaningful messages
- Never push secrets/passwords to GitHub
- Create branches for new features
- Pull regularly to stay updated
To wit, learning version control system might look daunting, but the real deal lies in its flow-you learn it and it becomes a second nature to you. You have come from a beginner up to your first commit using Git, pushing it even to code hosting platform.
This tutorial for beginners is simply the entry level for you. As you continue into the development journey, this tool will be your life jacket, your timeline, and your most trusted collaborator.
💡 Next Steps:
- Practice by building a small project
- Commit your work step-by-step
- Explore branches, merges, and pull requests
Remember, learning version control system is not just about mastering commands — it’s about becoming a professional developer who can track progress, collaborate, and never fear “breaking things.”
Final Thoughts
Whether you are learning how to code, building websites, or joining your first software development team, version control system has become mandatory rather than optional.
This version control system tutorial for beginners is designed to walk you through learning version control system from the scratch. By reading this article, you will be advancing from zero to hero by performing your first version control system commit without any fear.
So let’s begin.

